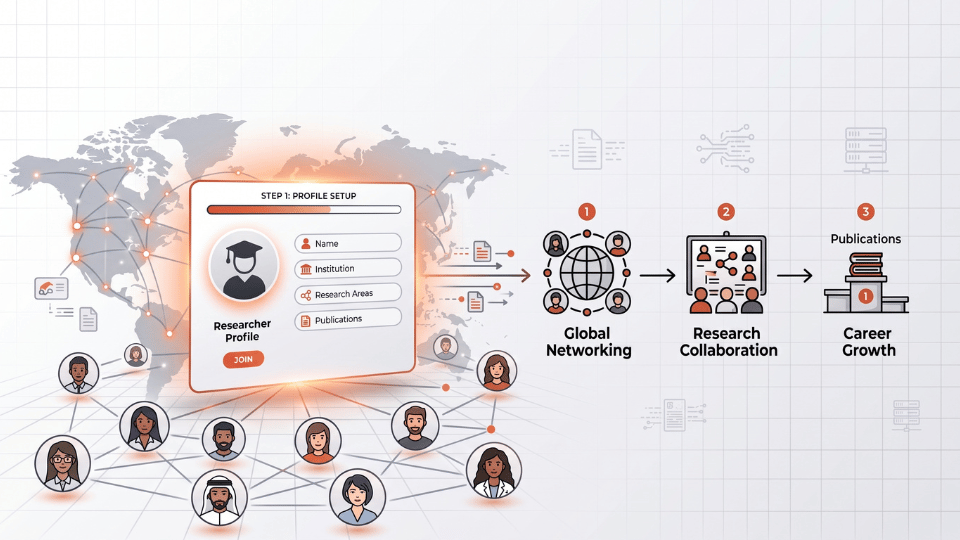
Welcome back to our step-by-step guide on mastering Researchmate.net! If you have successfully set up your researcher profile using Step 1, you are ready for the most exciting phase: bringing your academic ideas to life. Whether you are leading a complex systematic review, coordinating a multi-university engineering study, or simply keeping your final-year thesis on track, organization is the bedrock of successful research. Today, we are diving into the core workflow: creating a new project.
Read this article for a comprehensive, step-by-step guide on how to set up your new project using lightning-fast AI or full manual controls!
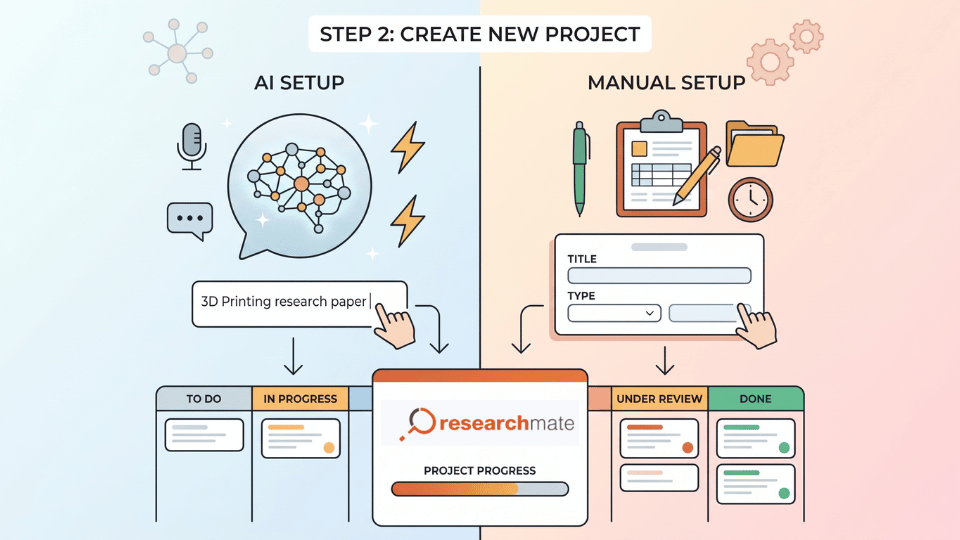
Researchmate.net is engineered to bridge the gap between quality research and modern productivity. We know that every researcher works differently. Some want meticulous control over every variable from day one, while others prefer to fast-track the administrative heavy-lifting using artificial intelligence. That is why our platform offers distinct pathways to launch your workspace. Let’s explore how you can transition from a blank canvas to a fully operational project board.
1. The Starting Point: Your ‘My Projects’ Dashboard
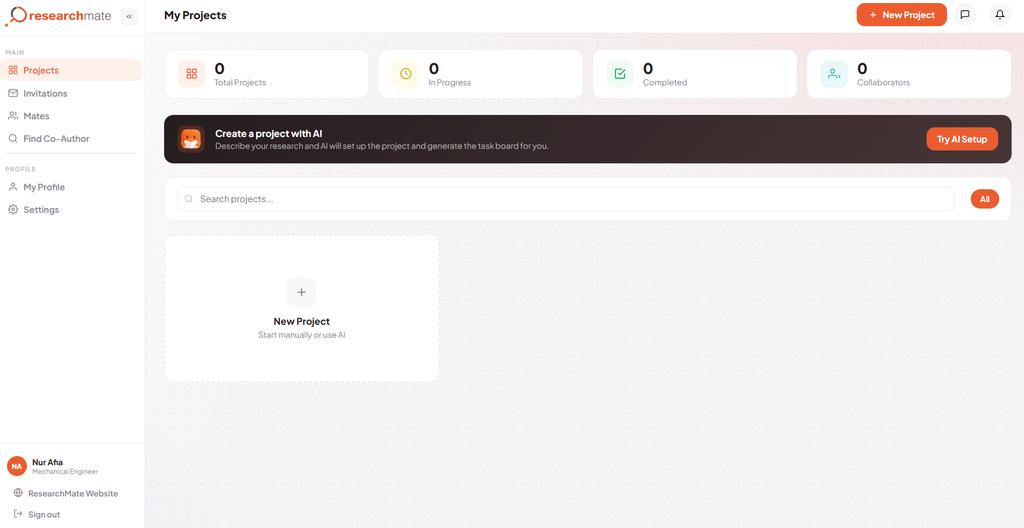
Everything begins on your My Projects dashboard. This is your centralized command center. At the top of the interface, you are greeted with a high-level overview of your research metrics: your Total Projects, those currently In Progress, your Completed endeavors, and your active network of Collaborators.
When you are ready to initiate a new study, the dashboard provides a clear call to action. You will see a large, unmissable banner inviting you to “Create a project with AI,” complete with an inviting “Try AI Setup” button. Alternatively, you can click the central “+ New Project” card right below the search bar to get started.
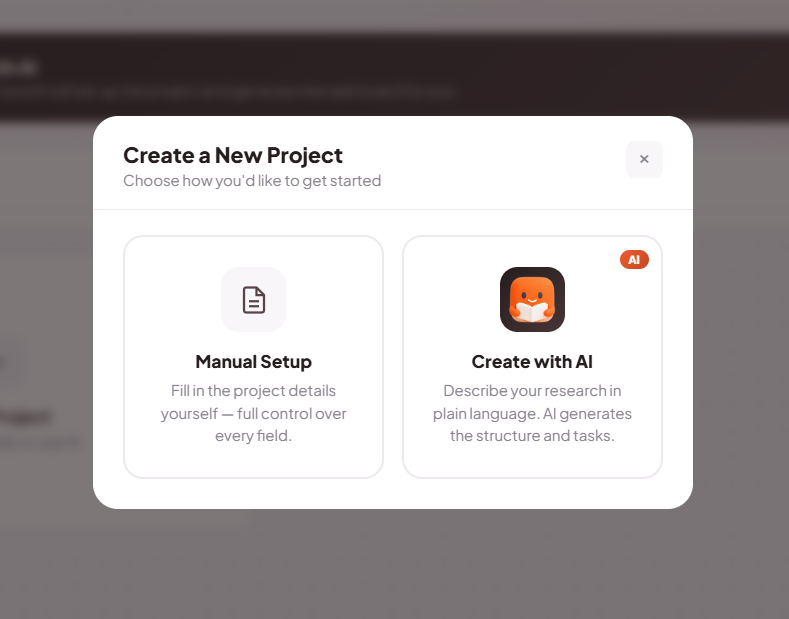
Clicking to create a new project triggers a modal popup that asks a crucial question: How would you like to get started? You are presented with two distinct choices:
Here, users can choose whether to create new project manually or using AI.
Manual Setup: Fill in the project details yourself — granting you full control over every single field.
Create with AI: Describe your research in plain, natural language, and let our AI generate the structure and tasks.
Let’s break down both options to help you choose the best fit for your workflow.
2. Path A: The AI Project Setup (The Fast Track)
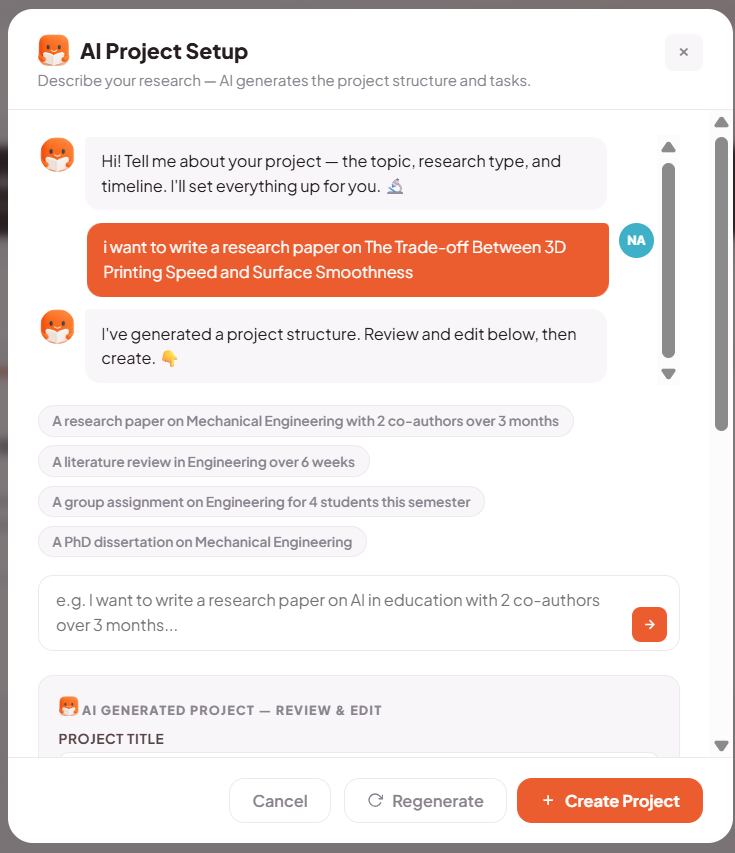
For researchers facing a blank page, the AI Project Setup is a massive time-saver. When you select the AI option, you are greeted by our friendly virtual assistant. The assistant simply asks you to describe your project—including the topic, research type, and timeline.
Setting up a new project in Researchmate.net is made easy with the AI tool.
Imagine you are a mechanical engineer exploring additive manufacturing. You simply type a conversational prompt into the chat box, such as: “i want to write a research paper on The Trade-off Between 3D Printing Speed and Surface Smoothness”.
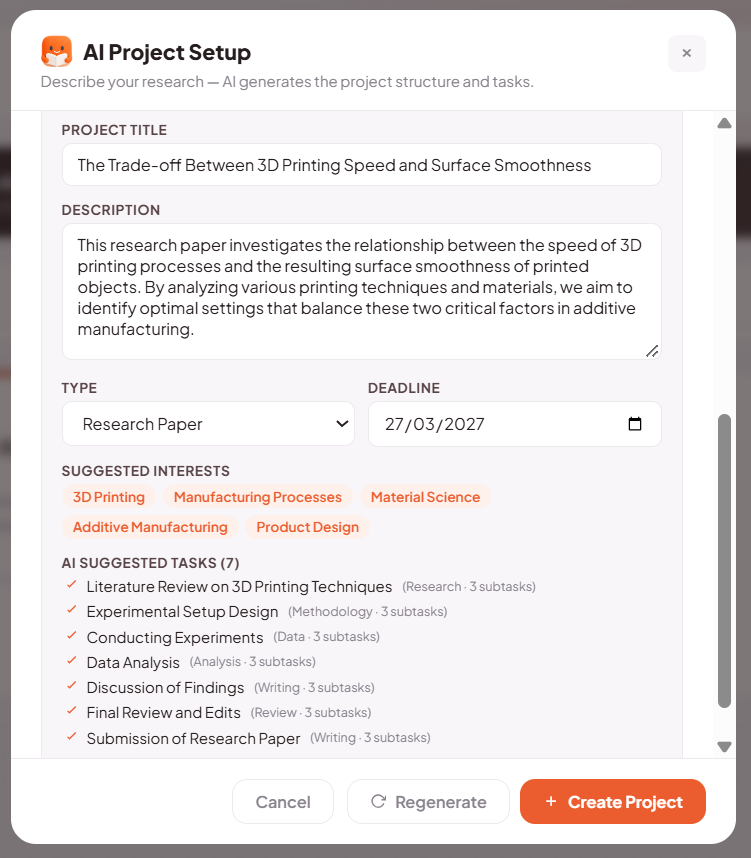
Within seconds, the AI processes your request and drafts a comprehensive project structure for your review. The generated preview is incredibly detailed:
Project Title & Description: The AI perfectly formulates your title and generates a robust description, stating that the project will investigate the relationship between 3D printing speed and surface smoothness by analyzing various techniques to identify optimal settings.
Suggested Interests: It automatically tags your project with relevant research areas like 3D Printing, Manufacturing Processes, Material Science, Additive Manufacturing, and Product Design.
AI Suggested Tasks: The AI pre-populates a chronological list of several core tasks to guide your study. These include Literature Review on 3D Printing Techniques, Experimental Setup Design, Conducting Experiments, Data Analysis, Discussion of Findings, Final Review and Edits, and Submission of Research Paper.
If you are happy with the AI’s suggestions, simply click Create Project. If not, you can easily hit “Regenerate” to get new ideas or edit the text fields directly before launching.
3. Path B: The Manual Setup (Full Control)
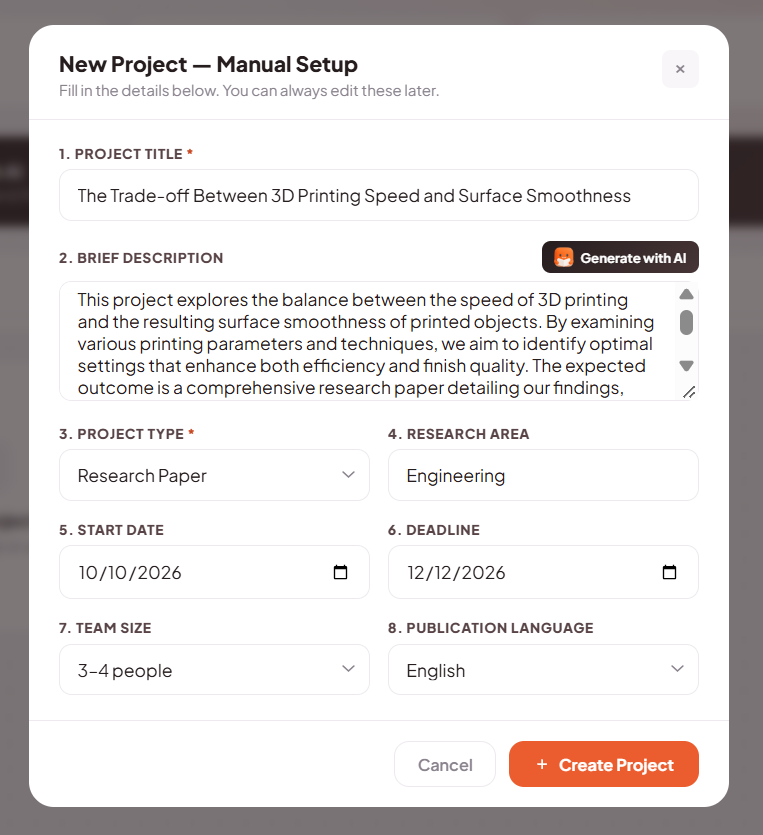
If you are transferring an existing project or have a strict, pre-approved proposal, the Manual Setup is your best route. This option opens a clean, structured form where you dictate every parameter.
You will fill out essential details to structure your workspace:
Users can also opt to manually create a new project if they prefer to have full control over every specific detail and parameter from day one.
Project Title & Brief Description: Enter your exact title and summary. If you experience writer’s block, you still have access to a “Generate with AI” button specifically for the description field.
Project Type & Research Area: Categorize your work accurately by using the dropdowns. For instance, you can set the project type to “Research Paper” and type in “Engineering” for the research area.
Timeline & Logistics: Define your exact Start Date and Deadline using the calendar tool. You can also specify your Team Size, such as 3-4 people, and select your Publication Language.
Once your parameters are set, hit Create Project to instantly generate your workspace.
4. Your Command Center: The Project Board
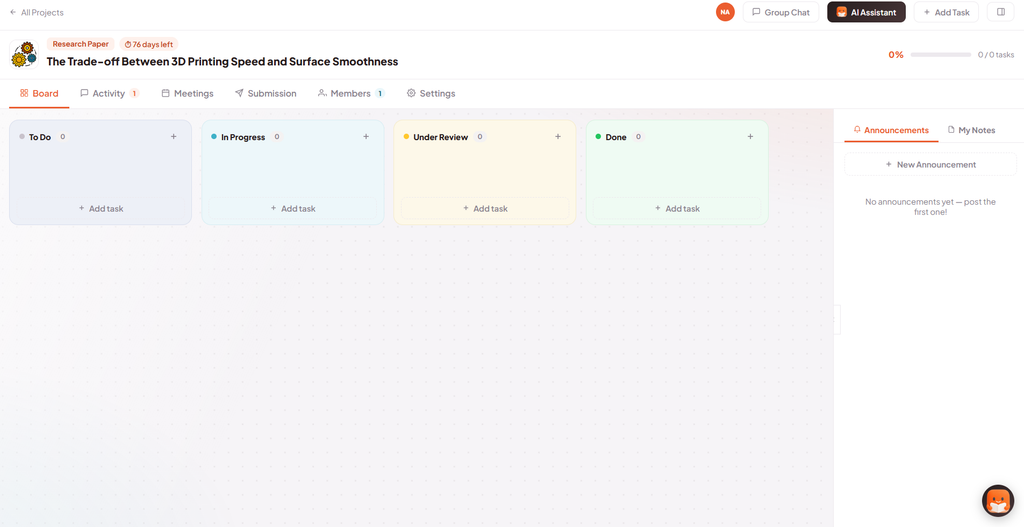
Whether you used AI or set it up manually, you will land on your new Project Board. This is a dynamic Kanban-style project management workspace designed specifically for academic workflows.
The header clearly displays your project title, the project type, and a countdown timer keeping you aware of how many days are left until your deadline. Below that, you will find intuitive navigation tabs: Board, Activity, Meetings, Submission, Members, and Settings.
The dynamic project board allows you to manage and track your tasks easily.
The core of your daily management happens on the Board tab, which is divided into four critical stages: To Do, In Progress, Under Review, and Done. To your right, a sidebar keeps you updated with Announcements, My Notes, and quick access to the AI Assistant.
5. Breaking It Down: Creating & Managing Tasks
Utilizing AI to Create New Task
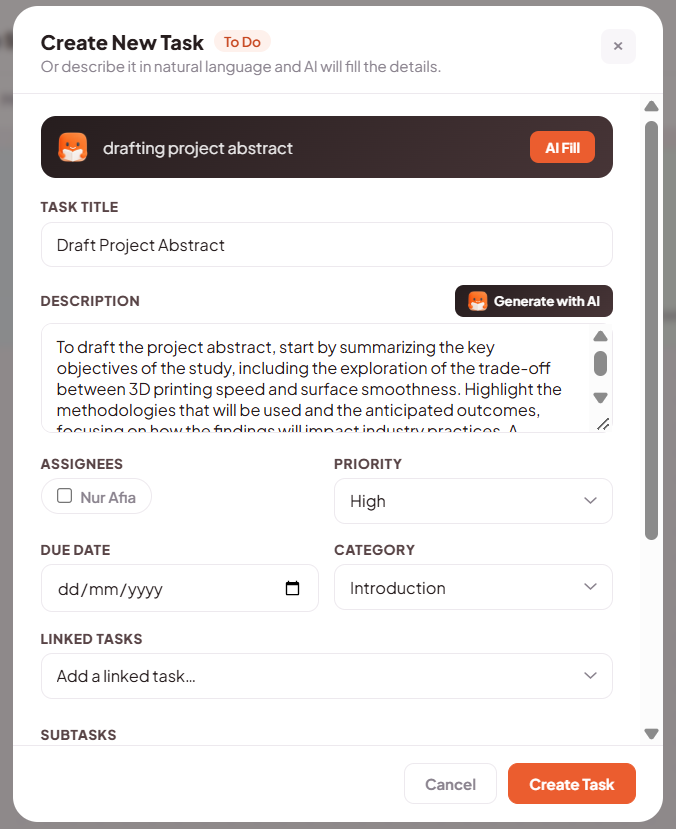
A massive research paper is daunting, but breaking it down into actionable tasks makes it achievable. When you click to add a new task to your board, you can utilize the AI once again.
By typing “drafting project abstract” into the AI Fill bar, the system automatically fleshes out the task details. It generates a comprehensive description advising you to summarize key objectives, methodologies, and anticipated outcomes.
Setting Tasks Priority
You can manually set the priority to “High”, “Medium” or “Low”. This is important for ensuring that critical path items are addressed promptly, preventing bottlenecks in your research timeline, and keeping the entire team aligned on urgent deliverables.
Assigning Task to Team Members
Crucially, here you can also assign tasks directly to specific team members of the research project. By tagging a collaborator—like assigning the abstract to a specific co-author—it becomes significantly easier to divide the workload, establish clear ownership, and monitor the team’s overall progress without endless email threads.
Adding Specific Sub-Tasks
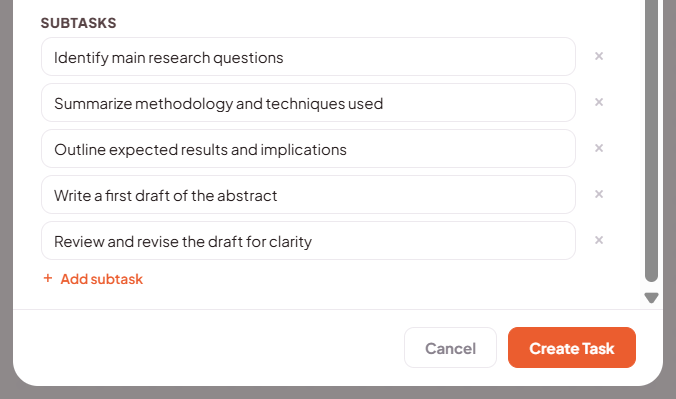
To get even more granular, you can add specific step-by-step subtasks. For the abstract, your subtasks might include:
Identify main research questions.
Summarize methodology and techniques used.
Outline expected results and implications.
Write a first draft of the abstract.
Review and revise the draft for clarity.
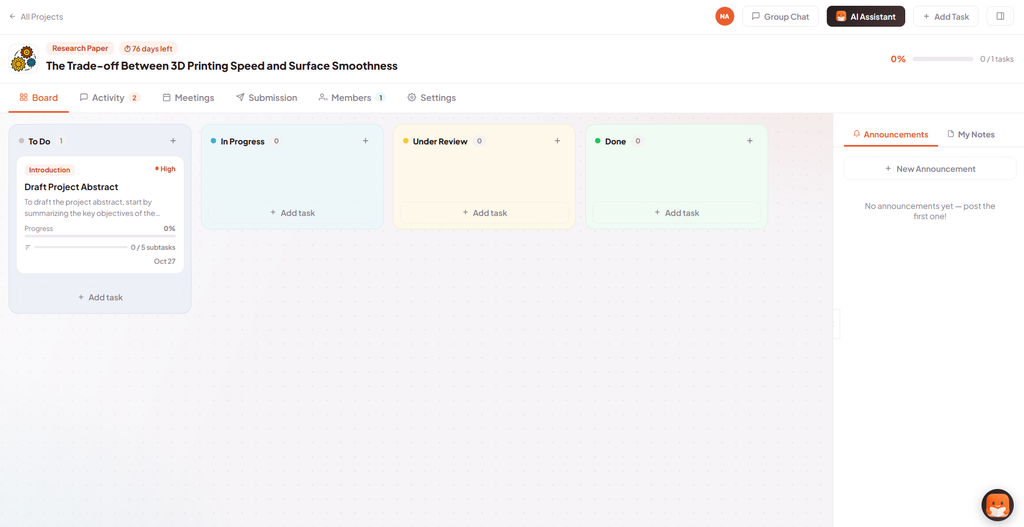
Once created, this task appears as a card in your To Do column. The card gives you a quick visual overview, displaying the High priority tag, the Introduction category, and a progress bar showing “0/5 subtasks” completed. The overall project progress bar at the top right of your screen will also reflect a 0% completion rate.
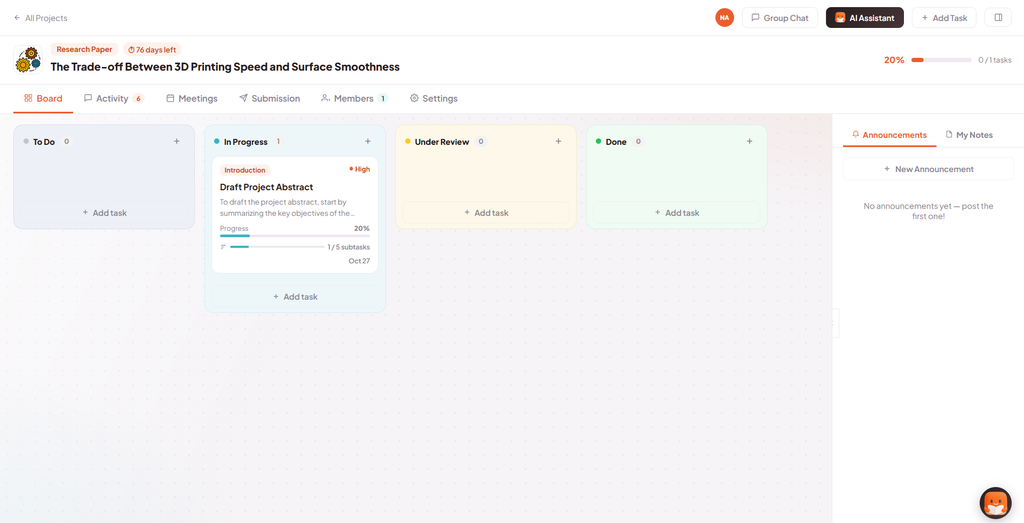
As your research progresses, Researchmate.net visually tracks your momentum. When you drag the task card into the In Progress column and begin ticking off subtasks, the interface updates in real-time. Checking off one subtask updates the card to show a 20% completion rate, indicating 1 out of 5 subtasks is done. Simultaneously, the global project progress bar at the top of your workspace advances to 20%, giving you and your co-authors an immediate sense of accomplishment.
Conclusion
Creating a project on Researchmate.net is designed to be frictionless, giving you more time to focus on the actual science rather than the administration of it. Log into your account today, head over to your dashboard, and start your next big research endeavor!

1 Comments